Showing posts with label Accessory. Show all posts

Monday, January 16, 2012

The Ea Z. Baby Quilt

“Dan, how long is the  baby?” “15  inches, why?”  Washed, blocked, and pressed — this baby quilt is done and done! I wanted to make make sure it was big enough before I caught the G train for a visit. Ea Zarathustra Davis is the man of the hour and what a handsome little fellow he is.

This is the “Ea Z. Baby Quilt,” a modular hexagonal knit that’s surprisingly simple to make, although it took me a few collective weeks to design and knit. It’s soft and durable, made from Lang Cashmere Tweed and Cascade 220 in shades of pumpkin and tangerine. It’s about 30" at it’s widest point, but since it’s modular it can be made larger.


Wardrobe is very important to a growing baby. As soon as he outgrows his AC/DC T-shirts, he’ll have a new Pantera onesie pressed and waiting for him. I'll also have some hats ready for him by then.


More late nights are ahead for Dan and Carrie, and there will be some adjustment for Casandra the cat. But this little trouble maker is worth all of that. Maybe Casandra needs her own quilt.

Sunday, December 11, 2011

The Multi-directional Scarf — a Short Row Exploration

I recently hosted an instructional knitting circle at Headroom Digital Audio for executive producer Jennifer Hunt’s clients. I introduced the group to the Multi-directional Scarf. This technique lends itself handsomely to scrap yarns, and yarns of variegated color or varying thickness.

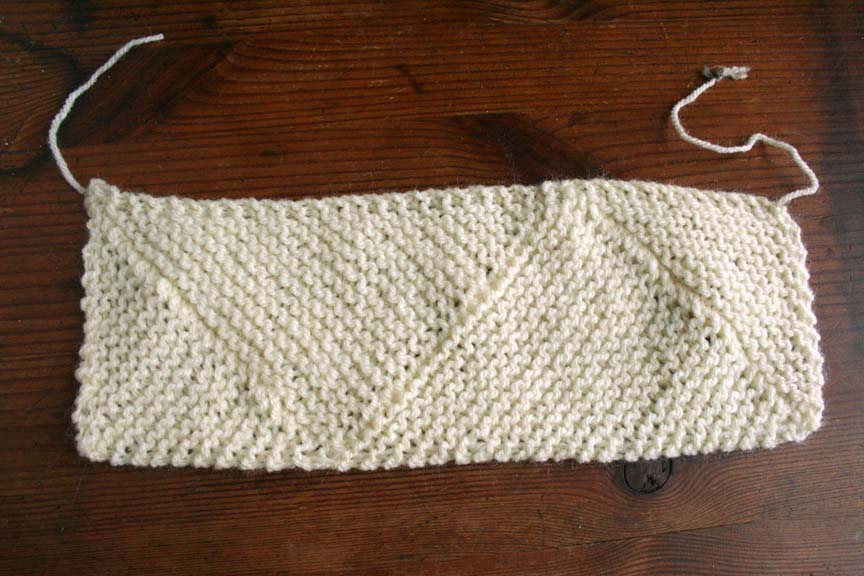
Introducing the Multi-directional Scarf This garter stitch scarf is 24 sts wide, but you can use any reversible pattern as long as it uses an even number of stitches. It’s made in sections that meet obliquely at perpendicular angles. The components are the first and last triangles, and a modular short-row section which you’ll repeat to a desired length. Short row is a method of increasing an area in the middle of your work by turning on a stitch and changing direction —a.k.a. “Wrap and Turn” (W&T). Combined with a series of increases and decreases it gives the usual straight path a diagonal orientation.

You’ll need:
- Worsted weight yarn (400 yds or more)
- US# 6 or 7 SPN
- 1 stitch marker
- Tapestry needle

First Triangle
Cast on 2 sts and work flat. Knit 1 front and back (k1fb), k1, turn.
*K1fb, knit to end of row, turn. rep from * until your triangle is 24 sts wide. Congratulations, you got through the first step.
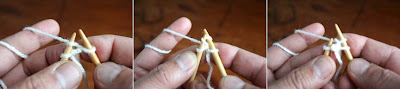
”Knit 1 Front and Back“ (k1fb) is a type of increase that can be made on every row. Knit into the first st keeping the loop on the left needle. Insert the right needle through the back of that same loop on the left needle and knit that st again. 
Modular Triangle
R01: (RS) K1fb, k2tog. Place a marker behind the first st on the left needle. Bring yarn to the front, sl1, return yarn to back, turn.

R02: Sl1, bring yarn to the back, knit to end of row. 

Changing the direction in the middle of your work by slipping and wrapping the yarn around a stitch is known as Wrap and Turn (W&T). Consecutive W&T rows increase a specific working area. This method is called Short Row.

R03: (RS) K1fb, knit until 2 sts before the marker, k2tog. Move marker behind the first st on the left needle. Bring yarn to the front, sl1, return yarn to back, turn.
R04: Sl1, bring yarn to the back, knit to end of row.

Repeat R03 and R04. Stop when you have 24 sts on the right needle. Be sure to remove the marker on the last row. Turn and repeat these modular instructions to create as many sections as you want until you have a suitable length for a scarf.

Last Triangle
R01: (RS) K1fb, k2tog. Place a marker behind the first st on the left needle. Bring yarn to the front, sl1, return yarn to back, turn.
R02: Sl1, knit to end of row.
R03: (RS) K1fb, knit until 2 sts before the marker, k2tog. Move marker behind the first st on the left needle. Bring yarn to the front, sl1, return yarn to back, turn.
R04: Sl1, knit to end of row.

Repeat R03 and R04. Stop when you have 2 more st to the left of the marker than on the right on your left needle (11 to the left, 13 to the right).

R05: (RS) k2tog, knit until 2 sts before the marker, k2tog. Move marker behind the first st on the left needle. Bring yarn to the front, sl1, return yarn to back, turn.
R06: Sl1, knit to end of row.

Repeat R05 and R06 until you have 4 sts on the left needle. Remove marker and finish this section as such: K2tog, k2tog, turn, k2tog. Cut yarn and sew in ends with a tapestry needle. Wash and air dry flat,  There you have it, the Multi-direction Scarf.

Tuesday, October 04, 2011

Zuki — a Cherished Moment

“Thank You” by Paloma Baillie, 2011
H graphite pencil on printer stock, 8 1/2" X 11"

Sometimes art is a bolder reflection of life, than life itself. Often we cherish things that are simply intangible to others — snow globes, hand-me-down sweaters, a lock of hair, an envelope with baby teeth, old photos, letters and postcards. In Buddhist philosophy an attachment to a permanent self in a world of change causes suffering. But these possessions aren’t really what we keep. They are only souvenirs of an experience that enriched one’s life.

Much like this drawing of Zuki from possibly my youngest fan,  a bean filled possession has gone far beyond what any one person can hold in their hands. Of all the flattering things, this drawing is high on my list. “Thank You” Paloma B.!

Monday, September 19, 2011

The Two-color Zuki — Hand-knit for the Handheld

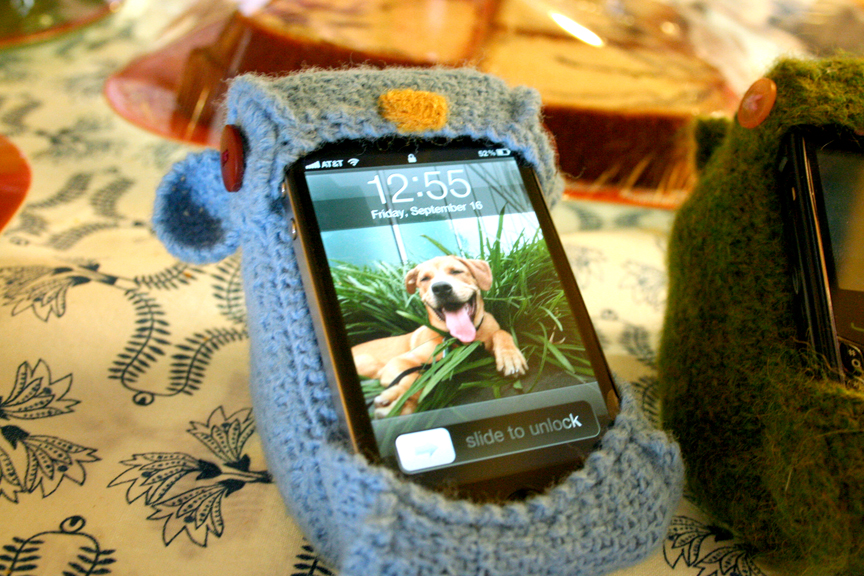
The Zuki Cell Phone Caddy is SoftWear made for the handheld generation. Here’s the final version of Zuki made with two colors of Misti Alpaca worsted weight yarn — soldier blue and dove gray. The eyes and ears are crocheted as one piece and sewn onto each side. The body is knit in two types of durable stitches — woven stitch for the uppers and sock stitch for the belly. Although it’s filled with dried Azuki beans you could use plastic beads. The pattern is written for the iPhone and Blackberry. Soon you can make your own Zuki.


Friday, September 16, 2011

Blue Zuki iPhone Caddy

OK Paloma, if you’re reading my blog it’s no surprise, I finally got around to finishing your Zuki iPhone caddy in your favorite shade of blue. It goes in the mail tomorrow bound for L.A . — Happy Belated Birthday and don’t text while walking!

I was very flattered — of all the things that a very hip tween wanted for her birthday, my friend Dawn’s daughter requested my Zuki cell phone caddy. Everything is just late, and as of late I’ve been busy developing Zuki’s big brother, the Wombat® iPad Tech Pillow. This Zuki is a vast improvement over the first one. It’s now 200% cuter. In other news, Tom and I have are close to getting the Wombat® into production and out to market. Cheers to TomTone Industries!

This bean bag caddy uses a combination of crochet and knitting techniques. The upper portion is knit in Woven Stitch. The eyes, ears, base and trim are crocheted. Check out Blue Zuki with Justin’s iPhone, shot at Prospect Perk Café. That’s Justin’s dog Rector in Zuki’s mouth.. or hands, or is it a pouch...


Monday, August 29, 2011

Trilby — A Study in Clothesline Crochet

This Trilby hat is a study in a corded crochet technique better known as “Clothesline Crochet.” This technique is actually the basic building block of Irish filigree crochet, where in a stiff cord is carried along a single-crochet row. Here’s a link to a quick tutorial.

The hat is eponymous with the tone-deaf heroine, Trilby O’Ferrall, from the George du Maurier novel (1894). Originally worn as a woman’s hat, it’s retro-popularity was resurrected by the likes of leading men Frank Sinatra, James Bond, of course The Blues Brothers and my favorite shady pathologist, Dexter.

The Tribly is similar to the Fedora but with a firm shorter brim up-turned in the back. I made this crochet hat with a more prominent grade to the front and an oblique oval crown instead of a classic teardrop.

This Trilby is made with Classic Elite Provence (100% mercerized cotton). I came up with a modified single crochet stitch that I call “Straw Braid” — it really does resemble the fine braid used on straw hats. The Clothesline Crochet technique keeps the crown and brim firm — a thicker cord on the crown than on the brim.

Monday, August 22, 2011

Ear-buds — Softwear for the BlackBerry

What do you do with three yards of DK silk? Pimp up the volume on your BlackBerry with silk ear buds. With a C hook, make an adjustable ring cast-on and close it with a slip stitch.

R01: 10 sc, then tighten ring cast-on. Do not join round.
R02: *Sc in top of ch, 2 sc into of chain into next st; rep from * to end of round.
R03 to R05: Sc in top of ch to end of round (St total: 15).

Cut yarn. Fit over ear piece then gather and sew the tail through the open edge with a tapestry needle. Make another one. These make a better cat toy than the original foam buds that came with the phone.


Wednesday, April 06, 2011

The Wombat® — Cool Softwear
for the iPad

My business partner Tom Pope and I have developed a different type of softwear — the Wombat® iPad Pillow, a plush mid-tech accessory for your iPad. This is our working prototype, but of course the final product will not be a hand knit item. BTW, for all you knitters, this is the Linen Stitch.

Wombat® iPad Pillow is adjustable, from a 30° tilt to dead-on flat for working vertically or horizontally. It’s easy on the wrists. It’s not a travel pillow, but it is designed to go from the table to the couch.


Don’t you just want to lay your head down on it? This is the Wombat® at rest. Flip it over, the feet raise it high enough to protect the iPad surface. Remember to flip your iPad screen-side in before you nap.

Soft corners allow you to plug in headphones or other external devices, just peel back. plug in, and play. So while you’re powering up your iPad, play your favorite iTunes and power-down for a quick nap.

We are TomTone Industries, the makers of technology accessories, the Wombat is our first product due out in the fall. And just like our favorite Aussie marsupial, Wombat® iPad Pillow also has a pouch. Isn’t this kick-ass cool?